Origami Folding Techniques to Master
Origami is a hobby that anyone can pick up. It’s fun and suitable for all ages, and all you need is paper. Learning the basic origami folding techniques will allow you to master any type of origami design with a little patience and practice. This guide will help to get you started by showing you the main techniques and folds that are used as a foundation in the majority of origami art.
The art of origami has been practised in Japan since the 17th century. Origami comes from the Japanese words oru (folding) and kami (paper), which perfectly describes exactly what origami is. Origami transforms a single piece of paper into a three-dimensional sculpture through the simple act of folding. All origami designs start with the same basic folds which we will discuss and explore.
To begin, all you need is washi paper, which is a type of origami paper. Washi paper is a lightweight paper specifically designed for the art of paper folding. These come in a range of colours and patterns and are suited to beginners since they are easy to manage and fold.
Browse our paper category here, including:
- Digital & Graphic Paper
- Drawing Paper & Pads
- Mixed Media Paper
- Painting Paper
- Tracing Paper
- Watercolour Paper
Basic origami folding techniques
Valley fold and mountain fold
Every origami design starts out with these basic folds. Simply fold the paper in half along the vertical, horizontal, or diagonal axis. The only difference between a valley fold and a mountain fold is that one is folded to make an upside-down tent or mountain shape, while the other is reversed, representing a valley or ‘v’ shape.
Cushion fold
The cushion fold is used in various origami designs, such as an origami sunflower or origami pleated box. Also named the Blintz Base, it is often referred to as the cushion fold, because the technique of folding four corners in toward the middle of the paper is used in cushion making in Japan.
- Fold the paper along its vertical axis and then unfold it. Now fold the paper along its horizontal axis and unfold it. At this stage, you will see the valley folds along the vertical and horizontal lines.
- Fold the paper so that each of the four corners joins in the middle of the paper.
[]
Kite fold
The kite fold is one of the simplest bases to make. It is a set of three different folds to create a shape similar to a kite.
- Make a valley fold along the diagonal axis of the paper and unfold it.
- Now fold the right corner to meet the crease in the centre.
- Fold the left corner to meet the crease in the centre. Your kite base should resemble a kite or ice cream shape.
[]
Square base
A square base fold is required for making complex folds and origami designs at an advanced level. The square fold is used to make the traditional crane, flower, fish, and more.
- The first step is to make mountain folds along the vertical and horizontal axes of the paper. Valley folds are then made along the diagonal axis. After making these folds, unfold the paper.
- Now hold the paper at two opposite corners and bring them together at the centre.
- Continue the same process with the other two corners from the outside.
[]
Basic origami shapes
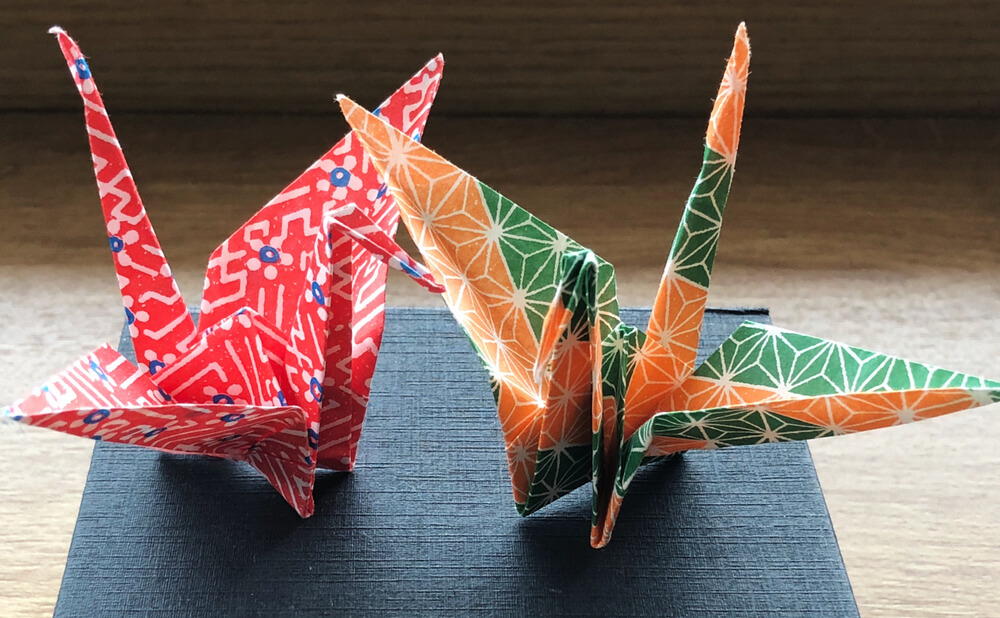
Crane
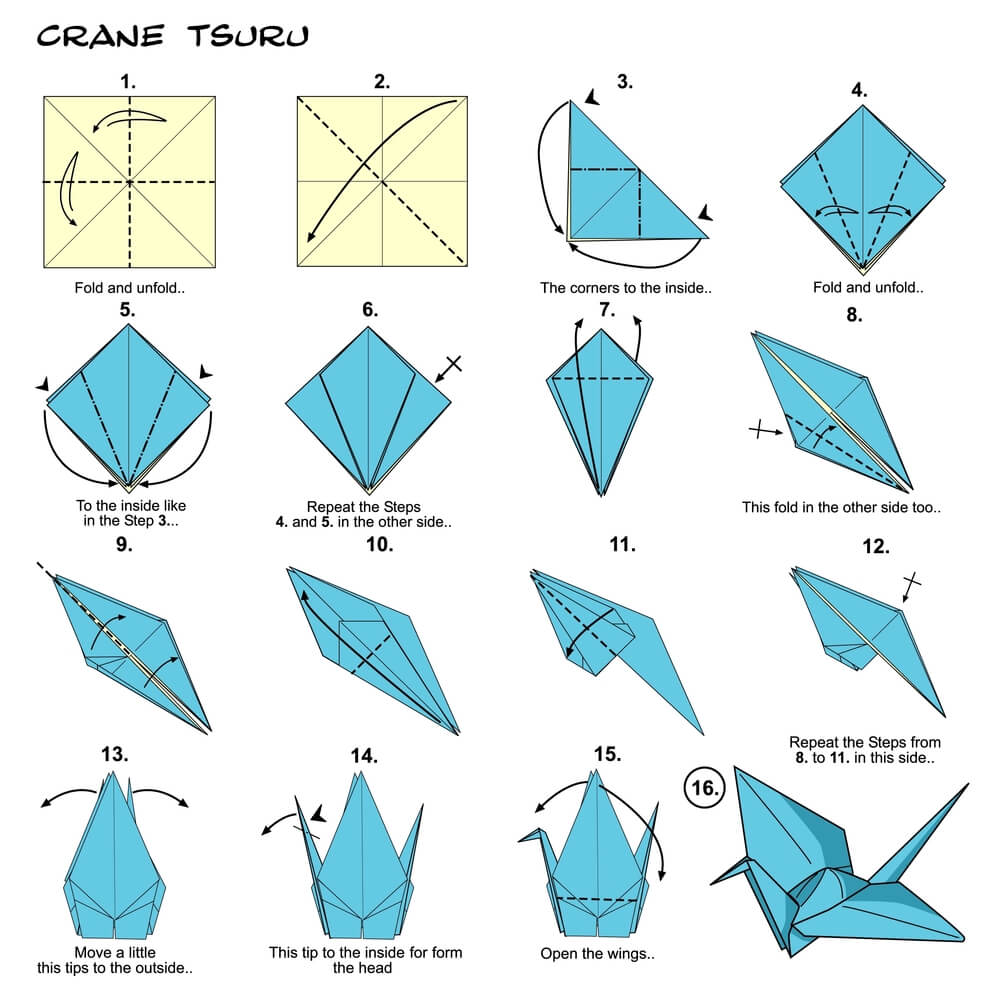
The paper crane is one of the most well-known origami designs. It looks tricky to make, but it’s actually quite simple. The origami crane, or tsuru, has its symbology from the story of the 1001 cranes. All you need is your square washi paper to start.
- Start by making a square base.
- Next, make a squash fold by making sure that the lower end of your square fold is left open. Fold the left and right lower edges at the central crease and unfold.
- Fold the top section down from the previous two creases and unfold.
- Pull one layer up from the bottom, along the areas you just made.
- Push the left and right edges inward to create the squash fold.
- Flip your model over and repeat the squash fold on the other side.
- Next, fold the lower right flap up and out to the right and unfold.
- Open up that flap and inside reverse fold it up to the right. Do the same with the tail.
- Now create both wings by folding them down, and then create the head by flattening the flap and inside reverse folding a small section at the top.
Elephant face
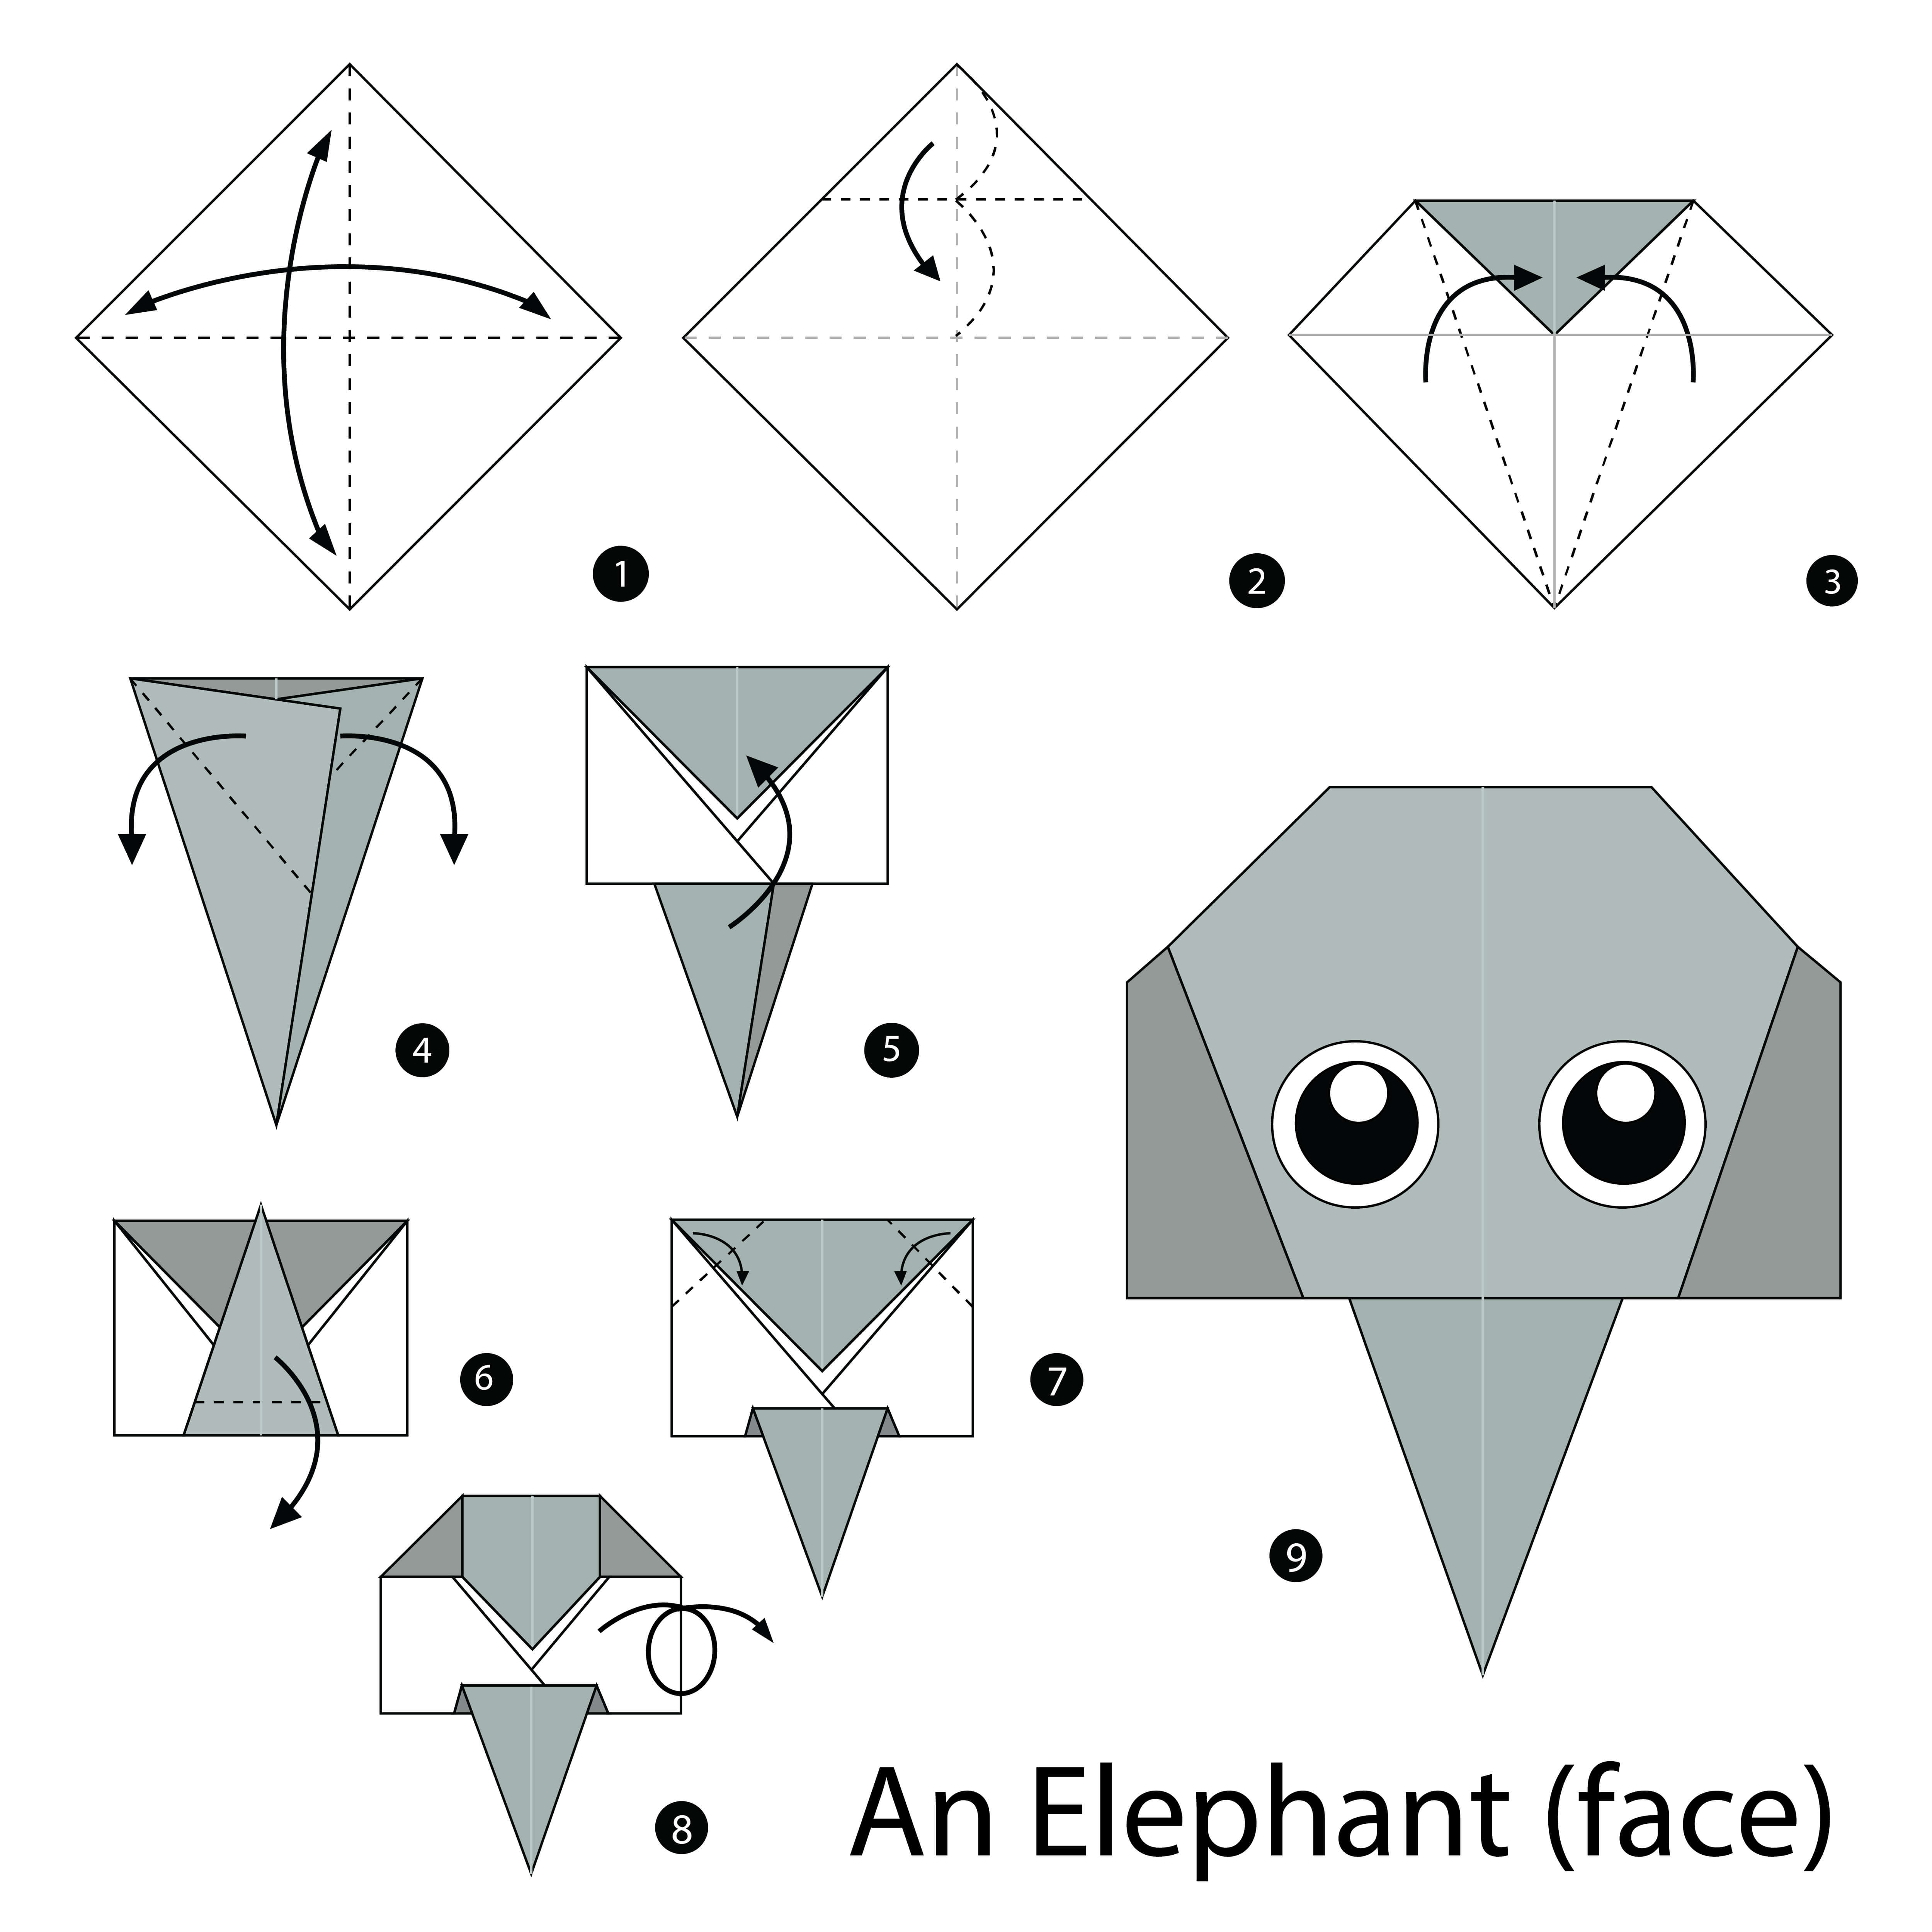
This elephant origami is one of the easiest to create. The final design is so cute and you can even add to it by drawing in eyes or sticking on googly eyes for a fun effect!
- Start by folding on both diagonal axes and unfold to reveal crease marks.
- Fold the top tip down to where both the diagonal creases meet. At the same time, fold the bottom tip up slightly, approximately ½ an inch or 1.5cm.
- Fold both outer sides toward the centre so that both flaps overlap.
- Now fold both sides out to create the shape of the ears.
- Flip the paper over to reveal the elephant head.
- Fold up the trunk.
- Now fold the trunk back down allowing for some space between the previous fold and this one. Fix the shape of the ears by folding both corners inward.
- Begin folding the trunk back up and down like a fan or concertina and release the fold.
- Your origami elephant face is done!
See our related articles here: